Maintaining a First-Person View (FPV) drone is fundamentally different from caring for a commercial photography drone. Commercial drones are highly automated, enclosed systems designed for gentle flights. FPV quadcopters are high-performance, open-frame machines that regularly endure extreme vibrations, high crashes, and exposure to harsh environmental elements.
Neglecting basic maintenance on an FPV drone does not just result in a poor flying experience; it directly leads to catastrophic mid-air failures, lost equipment, and potential safety hazards. By establishing a rigorous, disciplined inspection routine, you can preemptively catch component fatigue, optimize flight performance, and save hundreds of dollars in replacement parts.

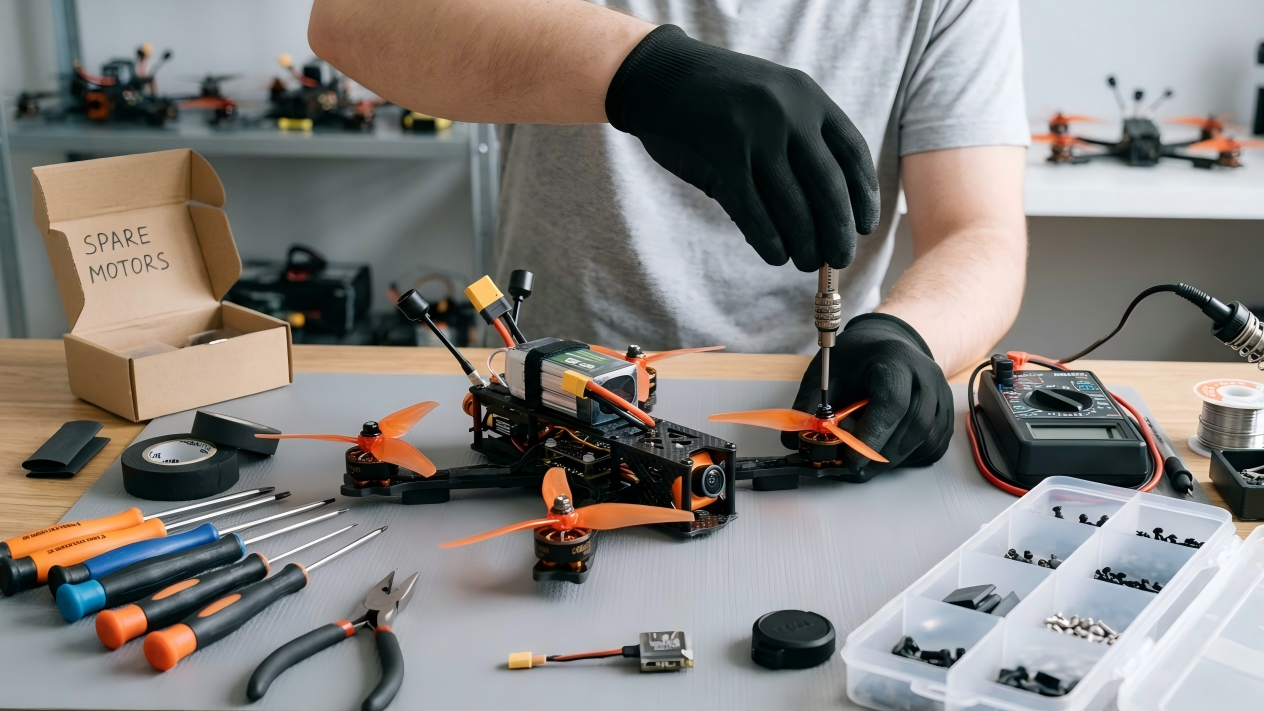
Fig. 1 FPV Drone Maintenance
1. The Pre-Flight Inspection: Your First Line of Defense
A pre-flight check takes less than two minutes but is the most critical routine you will perform. It ensures that the drone you are about to launch is mechanically and electronically sound before it spins up to 30,000 RPM.
Propeller Integrity and Security
Propellers are the most volatile component on your drone. They spin at incredibly high velocities and experience massive centrifugal forces.
- Visual Inspection: Look closely at the leading and trailing edges of each blade. Check for micro-cracks, white stress fractures in the plastic, or deep chips caused by clipping twigs or gates. A cracked prop can explode mid-air under high throttle.
- Structural Flexibility: Gently bend each blade. If a blade feels unusually flimsy or stays bent, the structural integrity of the polycarbonate has failed. Replace it immediately.
- Prop Nut Tightness: Grab each motor bell and attempt to spin the propeller independently. If the prop slips even slightly, your prop nut is loose. Use a hex driver or prop wrench to tighten the nyloc nut until it is locked firmly against the hub.
Motor and Fastener Verification
Vibration is the natural enemy of threaded fasteners. The high-frequency oscillations produced by brushless motors can back screws out of carbon fiber over time.
- The Manual Spin Test: With the battery disconnected, spin each motor bell with your fingers. The rotation should feel smooth and uniform. If you feel a gritty resistance, clicking, or a sudden stop, you likely have dirt, magnetic debris, or iron sand trapped inside the motor bell.
- Frame Bolt Check: Give the main structural screws a quick twist with your hex driver. Pay special attention to the motor mounting screws on the bottom of the arms and the stack screws holding your flight controller and ESC. Loose motor screws can cause severe gyro noise, while loose stack screws can short out electronics.
- Arm Rigidity: Grab the main body of the drone in one hand and pull firmly on each arm with the other. There should be absolutely zero play, clicking, or flexing at the joints where the arms meet the main chassis.
Physical Security and CoM (Center of Mass)
- Battery Straps: Inspect your LiPo straps for fraying, tearing, or broken plastic buckles. A broken battery strap in mid-air will cause the heavy battery to eject, tearing out your power leads and causing an immediate unrecoverable crash.
- Antenna Placement: Ensure that your Video Transmitter (VTX) antenna and your receiver (Rx) antennas are securely mounted away from the spinning arcs of the propellers. If an antenna flops into a prop during a high-speed turn, you will instantly lose your video feed or control link.
2. Post-Crash Diagnostics: Isolating Hidden Damage
Crashing is an inevitable part of FPV piloting. Whether you clip a branch in a park or smash into concrete at a bando, you must perform a systematic damage assessment before attempting to take off again.

Fig. 2 Post Crash Diagnostics
Immediate Electrical Isolation
The very first step after a crash is to safely approach the drone and unplug the battery immediately. If a motor is jammed or a component is shorted, keeping the battery plugged in can burn out your Electronic Speed Controller (ESC) or cause a LiPo fire within seconds.
Debris Remediation
- Motor Clearing: Crashing into grass or dirt frequently packs debris inside the cooling vents of your brushless motors. Do not spin the motors if they are full of dirt. Use a small brush or a blast of compressed air to completely clear out all foreign objects.
- Moisture Removal: If you crash into wet grass or mud, look for water droplets on the electronics. Wipe them down immediately. If moisture got onto non-coated boards, do not power the drone back up until it has dried completely for several hours.
Structural and Mechanical Assessment
- Carbon Fiber Delamination: Carbon fiber handles blunt force well but can delaminate upon hard impacts. Examine the edges of the arms. If you see the layers of carbon separating, or if the arm feels soft and bendable, the structural stiffness is gone. A delaminated arm will flex under load, causing unfixable flight vibrations and mid-air oscillations.
- Solder Joint Inspection: Pop the top plate off if necessary to look at your electronics. Ensure that the heavy battery lead wires are still firmly soldered to the ESC. Check that smaller wires (like those going to the camera or receiver) haven't been tugged loose or partially severed by shifting components.
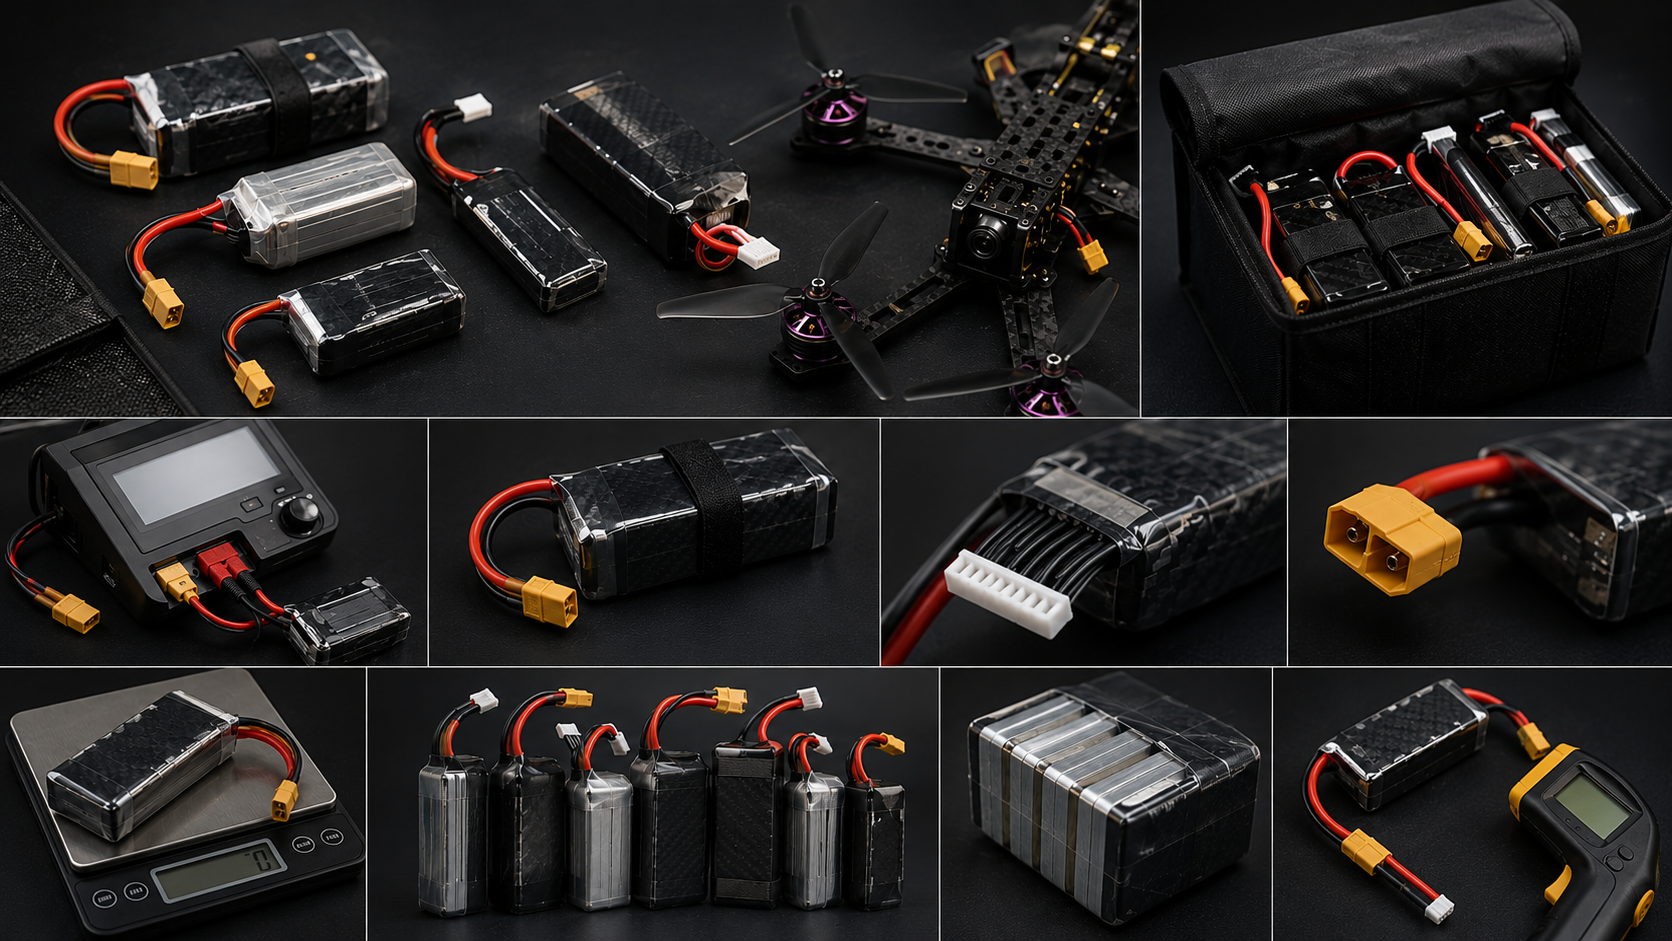
3. LiPo Battery Diagnostics: Safety and Performance Management
Your Lithium Polymer (LiPo) batteries are the most volatile and dangerous component of your entire FPV kit. They require dedicated diagnostic tracking to ensure they do not fail catastrophically during use or storage.
|
Diagnostic Metric |
Healthy Range |
Action Required |
Danger Zone |
|
Physical Shape |
Perfectly flat, firm sides |
Monitor closely |
Puffy, soft, or dented |
|
Internal Resistance (IR) |
1mΩ – 8mΩ per cell |
Balance charge slowly |
>15mΩ per cell (Degraded) |
|
Cell Voltage Balance |
<0.02V variance |
Run a balance cycle |
>0.1V variance between cells |
|
Low-Voltage Limit |
3.5V – 4.2V per cell |
Land drone immediately |
<3.0V under load (Damage) |
Physical Health Evaluation
Inspect every battery pack before charging it. Look for any signs of "puffing" or swelling, which indicates gas buildup from cell degradation. Check the protective plastic heat-shrink wrap for punctures, tears, or exposed aluminum casing. If a cell is deeply dented from a crash, retire the battery immediately by discharging it safely to 0V and recycling it. Dented cells represent a severe internal short-circuit and fire risk.
Internal Resistance Monitoring
Modern smart balance chargers can display the Internal Resistance (IR) of each individual cell in milliohms (mΩ). Make it a habit to check these numbers during your monthly maintenance.
- Low IR (1-8 mΩ): Indicates a healthy, high-performance cell capable of delivering high currents without sagging.
- High IR (15+ mΩ): Indicates an aging or damaged cell. The battery will get hotter during flights, sag earlier under throttle, and deliver less flight time.
- Mismatched IR: If one cell in a 6S pack reads 18 mΩ while the other five read 4 mΩ, that pack is unbalanced and unstable. It should be retired from high-performance freestyle or racing use.
Proper Storage Management
Never leave your batteries fully charged or completely empty for more than 48 hours. Storing a LiPo at 4.2V per cell or below 3.5V per cell degrades the internal chemistry rapidly. Always use your charger's Storage Charge/Discharge function to bring the cells to a stable 3.80V to 3.85V per cell when they are not in active use.
4. Bench Testing and Software Optimization
Physical cleaning is only half the battle. Digital and software maintenance ensures your firmware stays stable and your motor configurations remain clean.
Blackbox Data Log Analysis
If your flight controller has an onboard flash chip or an SD card slot, it records "Blackbox" flight data. Once a month, download these logs into the Betaflight Blackbox Explorer software.
Vibration Diagnostics: Look at your gyro noise profiles. If you see huge spikes of high-frequency noise on any specific axis (Roll, Pitch, or Yaw), it indicates mechanical vibration. This is your cue to change your bearings, replace slightly bent motor bells, or tighten your frame structural screws.
Firmware Cleanup and Re-Centering
- Sensor Calibration: Place your drone on a perfectly level table and run the accelerometer calibration tool in your configuration software. This ensures your stable flight modes remain truly flat.
- Fail-Safe Testing: Remove your propellers. Connect the drone to your configuration software, plug in a battery, and turn on your radio transmitter. Spin up the motors slightly via the software or radio interface. Now, turn off your radio transmitter. The motors must immediately stop spinning. If they keep spinning, your fail-safe is configured incorrectly, presenting a severe flyaway hazard. Fix this setting before going outside.
Summary Checklist for Long-Term Success
To make this regimen manageable, keep a small maintenance logbook alongside your gear.
1. Every Flying Day: Inspect your propellers, check arm rigidity, and verify your antenna mounts.
2. After Hard Crashing: Isolate power, clear dirt from motors, inspect for carbon delamination, and check solder connections.
By treating your FPV quadcopter with the same precision and care as a full-scale aircraft, you drastically reduce your bench-repair time, improve your flight handling characteristics, and ensure that when you punch the throttle, your hardware responds flawlessly.
Leave a comment
This site is protected by hCaptcha and the hCaptcha Privacy Policy and Terms of Service apply.