Flying First-Person View (FPV) drones offers an unparalleled sense of freedom, but that experience relies entirely on the quality of your video feed. Whether you are flying an analog setup or a high-definition digital system, video degradation can compromise your control and flight safety. Below are the top 5 most common FPV video problems and the precise, field-tested solutions to fix them.
1. Black Screen WITH On-Screen Display (OSD)
You power on your FPV goggles, and the telemetry data (battery voltage, flight mode, RSSI, and timers) appears perfectly crisp on the screen. However, the background behind the text is completely black, offering zero visibility of the environment.
This is a classic isolation symptom. Because the OSD is generated by the flight controller (or inside the digital air unit) and successfully transmitted to your goggles, your VTX-to-goggle radio link is working flawlessly. The failure lies entirely upstream: the video transmitter is not receiving an image signal from the camera sensor.
- First, Inspect the Camera Cable: Check the tiny ribbon cable (MIPI/coaxial) on digital systems or the three-wire harness (Power, Ground, Video) on analog setups. A hard landing can easily unseat these friction-fit plugs. Unplug the cable, check for bent or recessed pins under magnification, and snap it back in.
- Then, Verify Camera Voltage: Use a multimeter to measure the voltage across the camera's power and ground pads. If your flight controller’s 5V regulator has failed or is overloaded, the camera will remain powered off while the VTX (often powered by a separate 9V rail or direct battery voltage) continues to transmit the OSD.
- Last, Check the Lens Cap: While simple, leaving a dark lens cap or protective cover on the camera in the pits is a common oversight that perfectly mimics a dead camera sensor.

Fig. 1 Black Screen FPV Troubleshooting
2. Total Signal Loss or Solid Static (No OSD)
Your goggles display absolute snow and static (on analog) or a permanent "Disconnected" or "Searching" message (on digital platforms). There is no telemetry data, no video feed, and no response when changing channels.
The goggle receiver is completely decoupled from the video transmitter. This points to a total power failure at the VTX, a severe frequency mismatch, or a hardware failure caused by thermal overload.
- Your first step is to Confirm VTX Power Status: Look directly at the drone while the battery is plugged in. Are there status LEDs illuminated on the VTX board? If the LEDs are dark, trace the power wires back to the flight controller or PDB to look for cold solder joints, broken wires, or a blown voltage regulator.
- Thereafter follows the Manual Frequency Matching: Never rely entirely on the "Auto-Scan" feature on analog goggles. Auto-scan frequently locks onto a neighboring harmonic frequency that looks clear at close range but drops out entirely once the drone flies a few meters away. Manually set your VTX and your goggles to the exact same band and channel (e.g., Raceband Channel 8, 5917MHz).
- Deactivate Pit Mode: Pit Mode drops the VTX transmission power to less than 1mW to prevent interference with other pilots on the flight line. If your video drops to total static the moment you step away from your bench, verify via the Betaflight OSD menu or VTX button configuration that Pit Mode is disabled.
3. Throttle-Dependent White Lines and Water Ripples
The video feed looks pristine while the drone is disarmed or hovering quietly. However, the moment you punch the throttle or execute a hard maneuver, aggressive horizontal white lines, static bars, or scrolling water ripples distort the image.
This issue stems from electrical noise, specifically "Back-EMF" (electromotive force). As the electronic speed controllers (ESCs) rapidly brake and accelerate the brushless motors, they generate massive high-frequency voltage spikes that feed back into the main power lines. If the video components share these power rails without adequate filtering, this electrical noise manifests visually as lines across the screen.
The most effective fix is to install a high-quality, Low-ESR (Equivalent Series Resistance) capacitor directly across the main XT60 battery pads on the ESC or flight controller. Additionally, you can minimize stray electromagnetic interference by twisting your camera’s video signal wire tightly together with its corresponding ground wire, creating a basic twisted-pair configuration that naturally rejects radiated noise from nearby high-current motor leads.
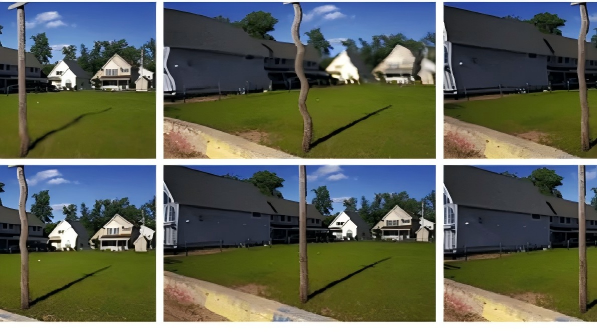
4. The "Jello" Effect (Wavy, Vibrating Footage)
The video appears as though it is underwater or vibrating through gelatin. The image warps, oscillates rapidly, and distorts horizontally, making it highly distracting and difficult to judge depth.
Jello is a physical artifact caused by high-frequency mechanical vibrations interacting with a rolling shutter CMOS sensor. Because a rolling shutter records the image line-by-line rather than capturing the entire frame instantaneously, any physical shaking of the camera during the scanning process causes each horizontal line to map to a slightly shifted position.
Eliminating jello requires the following actions:
- Balance or Replace Propellers: Even minor nicks, chips, or microscopic bends in a plastic propeller shift its center of mass. At 30,000 RPM, this imbalance creates immense high-frequency vibrations. Swap out damaged propellers for a fresh set immediately.
- Inspect the Motor Drivetrain: Spin each motor by hand. If you feel any grittiness, resistance, or lateral play in the bell, you may have a bent motor shaft or a crushed internal ball bearing from a previous impact. Replace the damaged motor components.
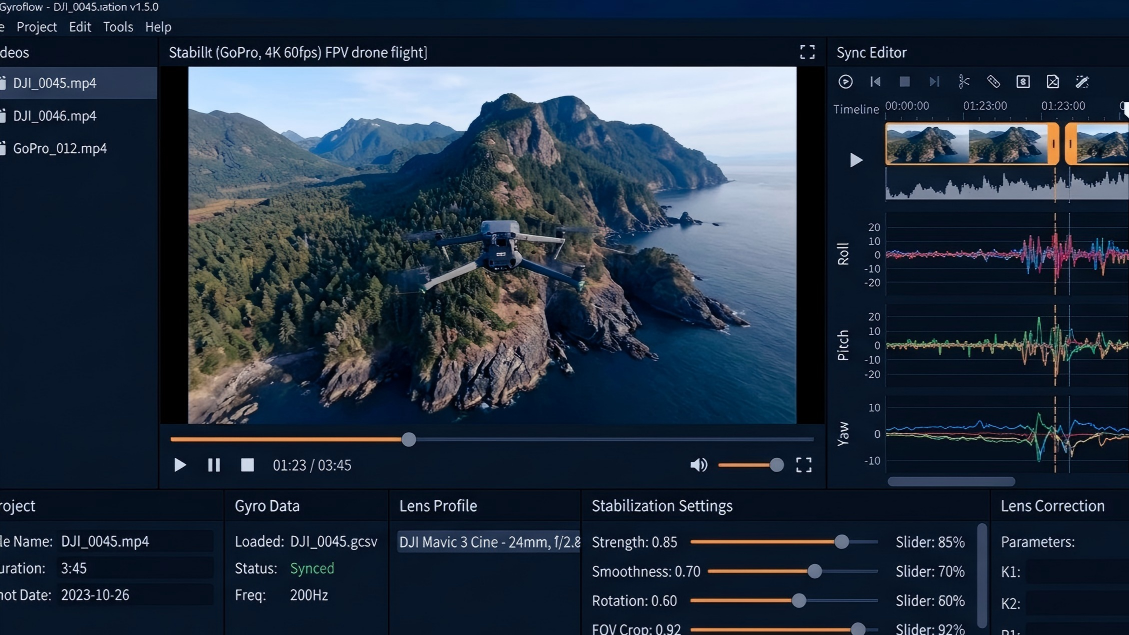
- Apply the ND Filter Trick: Mount a Neutral Density (ND) filter over your camera lens. ND filters reduce the amount of light entering the sensor, forcing the camera's automatic exposure algorithm to lower its shutter speed to maintain proper exposure (adhering to the 180-degree shutter rule, such as setting the shutter to 1/120s for a 60fps video). The slightly slower shutter speed introduces natural motion blur that blends out and masks micro-vibrations.

Fig. 2 Jello Effect and FPV Troubleshooting
5. Severe Range Dropout and Low Penetration
The video feed is clear within a short radius but degrades rapidly or drops out completely when flying behind a single tree, a thin wall, or at a fraction of the expected operational distance.
Poor range is almost always an RF (Radio Frequency) efficiency issue. It typically points to damaged antenna structures, severe polarization mismatch between the transmitter and receiver, or an internally damaged VTX amplifier.
To fix range issues:
- Verify Antenna Polarization: Ensure that the antennas on both your drone and your goggles utilize the exact same polarization format: either both Left-Hand Circular Polarized (LHCP) or both Right-Hand Circular Polarized (RHCP). Mixing an LHCP antenna with an RHCP antenna introduces an immediate 20dB signal attenuation penalty, effectively destroying your transmission range.
- Check the Internal Coaxial Element: Antenna housings often mask internal damage. After a crash, the fragile solder joint or crimp connecting the internal coax element to the connector pin can snap inside the plastic cap. Shake the antenna; if it rattles or bends easily at the base, replace it.
- Avoid Dry Firing the VTX: Never power on an FPV drone without a securely attached VTX antenna. Without an antenna to radiate the RF energy into the air, the transmitted power reflects directly back into the VTX amplifier stage, generating extreme thermal stress that can permanently degrade or burn out the transmitter components within seconds.
Summary Table: Top 5 FPV Video Problems and Solutions
|
Problem |
Common Symptoms |
Main Cause |
Recommended Fix |
|
Black Screen with OSD |
OSD visible but no camera image |
Camera signal loss, loose cable, no camera power |
Check camera cable connections, verify camera voltage, inspect lens cover |
|
Total Signal Loss / Static |
Static, “Disconnected,” or no video feed |
VTX power failure, wrong channel, Pit Mode enabled |
Verify VTX power, manually match frequency, disable Pit Mode |
|
White Lines & Water Ripples |
Noise appears during throttle punches |
ESC electrical noise and voltage spikes |
Install Low-ESR capacitor, improve wire routing, twist signal and ground wires |
|
Jello Effect |
Wavy, vibrating, distorted footage |
Mechanical vibration and rolling shutter interaction |
Replace damaged props, inspect motors, use ND filters and stable camera mounts |
|
Severe Range Dropout |
Weak penetration and short range |
Antenna mismatch, damaged antenna, RF inefficiency |
Match antenna polarization, replace damaged antennas, avoid powering VTX without antenna |
Conclusion
FPV video systems are highly sensitive. The key to effective troubleshooting is understanding what the symptoms are telling you. A black screen with OSD points toward a camera-side failure, while total static usually indicates a VTX or RF problem. White lines during throttle punches often reveal electrical noise, whereas jello footage almost always comes from vibration somewhere in the drivetrain or frame structure.
Reference:
Cai, Yang & Lam, Eric & Howlett, Todd & Cai, Alan. (2020). Spatiotemporal Analysis of “Jello Effect” in Drone Videos. 10.1007/978-3-030-20467-9_18.
Leave a comment
This site is protected by hCaptcha and the hCaptcha Privacy Policy and Terms of Service apply.